EVERY ORDER SUPPORTS FAMILIES IN NEED



Debonding burs
Related products
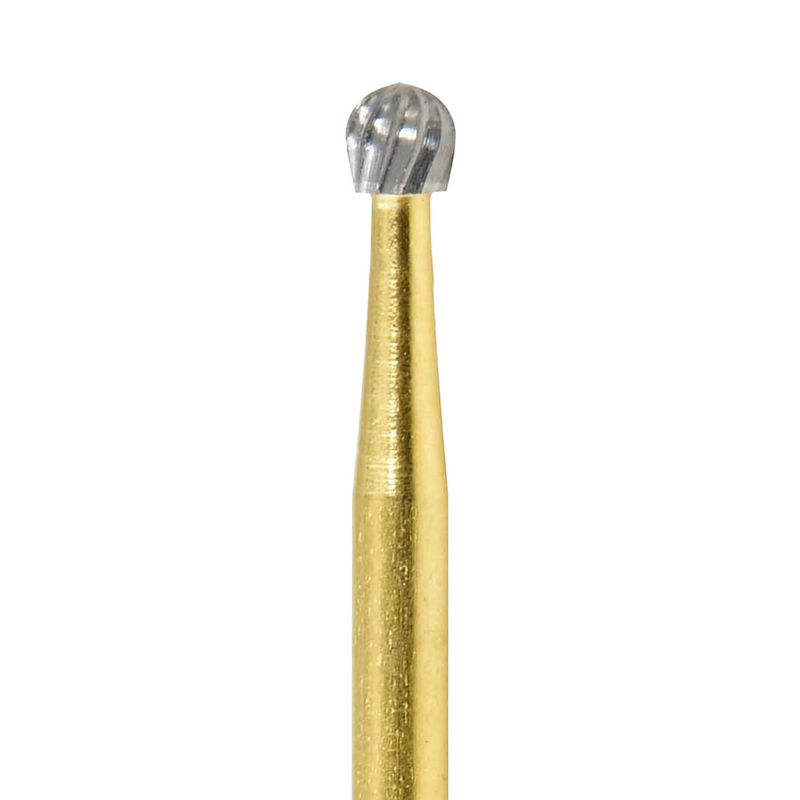
Eagle debonding burs are 12-blade carbide burs for cleaning orthodontic adhesive and composite off the enamel after brackets come off. They are made from one-piece tungsten carbide and come in three versions: a football-shaped finishing bur and a round 7006 bur on an FG shank, plus the same 7006 round bur on an RA (latch) shank for low-speed handpieces. Each pack holds 5 burs, made in Israel.
Which debonding bur do you need?
| Bur | Shape and shank | Best for |
|---|---|---|
| FG-K2RSF | Football-shaped finishing carbide, FG | Smooth, curved facial surfaces and blending the bonding area |
| FG7006 | Round, 12 blades, size 018 (1.8 mm), FG | Fast removal of bulk adhesive at high speed |
| RA7006 | Round, 12 blades, size 018 (1.8 mm), RA | Controlled low-speed cleanup close to the enamel |
Why use a 12-blade carbide for adhesive removal?
A standard 6- or 8-blade carbide is built to cut tooth structure quickly. A 12-blade (12-fluted) carbide bur has more, shallower cutting edges, so each edge takes off less material. That makes it a finishing bur: it shaves composite resin away in thin layers, chatters less and leaves a smoother surface. For orthodontic debonding that matters, because the goal is to remove every trace of adhesive while leaving the enamel as close to its original condition as possible.
Clinical uses
- Removing residual orthodontic adhesive after bracket removal
- Cleaning composite left behind after lingual retainers or attachments are removed
- Removing clear aligner attachments at the end of treatment
- Cleaning a tooth surface before re-bonding a repositioned bracket
- Finishing and contouring composite restorations
Debonding technique: step by step
- Remove the brackets first with debonding pliers, leaving the adhesive on the tooth rather than trying to take enamel and bracket off together.
- Dry the tooth and look. Adhesive usually looks duller and more opaque than enamel when dry. Note where the resin sits before you start.
- Remove the bulk with the FG7006 or FG-K2RSF in a high-speed handpiece. Use a light, feather touch and sweeping strokes, keeping the side of the bur moving across the adhesive rather than holding it in one spot.
- Switch to the RA7006 at low speed for the last thin layer near the enamel. The lower speed gives more tactile feedback, so you feel the change when the bur reaches enamel.
- Re-dry and inspect under good light. Repeat on any spots that still look dull or opaque.
- Polish the surface with rubber polishers or a polishing paste to restore luster.
Protecting the enamel
- Keep the bur parallel to the tooth surface. Tilting the tip into the enamel is the most common cause of gouges.
- Use light pressure only. The 12 blades do the work; extra force removes enamel, not just resin.
- Control heat. Work in short intervals and use water or air cooling with the high-speed bur. Many clinicians stop the water briefly to check the surface, since resin is easier to see on a dry tooth.
- Stop when the resin is gone. Don't keep "polishing" with the carbide once the surface looks uniform.
FG vs. RA debonding burs
FG (friction grip) burs fit high-speed handpieces and remove adhesive quickly, which saves chair time on full-arch cases. RA (right angle, latch) burs fit low-speed contra-angle handpieces. They cut more slowly, but give better control and feel, which is why many orthodontists prefer them for the final layer. A common workflow uses both: FG for bulk, RA for the finish.
Carbide vs. diamond for adhesive removal
Diamond burs grind and tend to scratch enamel, even in fine grits, so they're generally not the first choice for orthodontic cleanup. Multi-blade carbide burs cut the resin in a shaving action and usually leave a smoother surface that needs less polishing afterward. For a complete cleanup setup with polishers, see the bond removal kit.
Cleaning and sterilization
Each bur is made from one piece of tungsten carbide, so the head can't separate from the shank. After use, brush off resin debris or clean the burs in an ultrasonic bath, rinse, dry and autoclave. Store them dry in a bur block. Replace a bur once it starts to clog, heat up or cut slowly, because a dull finishing bur needs more pressure, and pressure is what damages enamel.
Ready to Subscribe?